Showing posts with label cloud. Show all posts

Saturday, August 14, 2021

Using rclone to download Objects from OCI

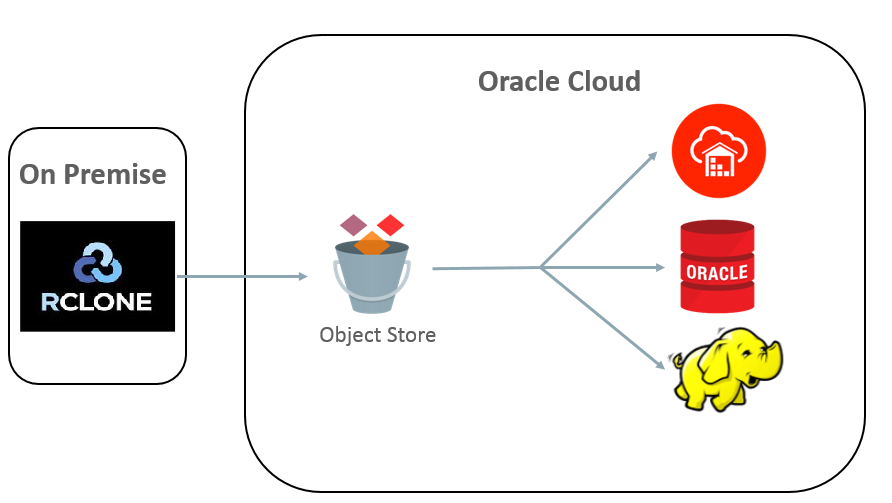
 I previously created a post that walked through how to configure rclone to easily access objects within the Oracle Cloud Object Store.


Object Store access with rclone


This post is going to go a little deeper on how to quickly download objects from the OCI object store onto your host.

In my example, I needed to download RMAN disk backup files that were copied to the Object Store in OCI.

I have over 10 TB of RMAN backup pieces, so I am going to create an ACFS mount point to store them on.


1) Create ACFS mount point

Creating the mount point is made up of multiple small steps that are documented here. This is a link to the 19c documentation so note it is subject to change over time.

  • Use ASMCMD to create a volume on the data disk group of 20 TB 
- Start ASMCMD connected to the Oracle ASM instance. You must be a user in the OSASM operating system group.

                    - Create the volume "volume1" on the "data" disk group

                    ASMCMD [+] > volcreate -G data -s 20G volume1

  • Use ASMCMD to list the volume information  NOTE: my volume name is volume1-123
                             
ASMCMD [+] > volinfo -G data volume1
Diskgroup Name: DATA

         Volume Name: VOLUME1
         Volume Device: /dev/asm/volume1-123
         State: ENABLED
     ... 

SQL> SELECT volume_name, volume_device FROM V$ASM_VOLUME 
     WHERE volume_name ='VOLUME1';

VOLUME_NAME        VOLUME_DEVICE
-----------------  --------------------------------------
VOLUME1            /dev/asm/volume1-123


  • Create the file system with mkfs from the volume "/dev/asm/volume1-123"
$ /sbin/mkfs -t acfs /dev/asm/volume1-123
mkfs.acfs: version                   = 19.0.0.0.0
mkfs.acfs: on-disk version           = 46.0
mkfs.acfs: volume                    = /dev/asm/volume1-123
mkfs.acfs: volume size               = 21474836480  (   20.00 GB )
mkfs.acfs: Format complete.
  • Register the file system with srvctl
# srvctl add filesystem -device /dev/asm/volume1-123 -path /acfsmounts/acfs2
       -user oracle -mounttowner oracle -mountgroup dba -mountperm 755
NOTE: This will mount the filesystem on /acfsmounts/acfs2

  • Start the filesystem with srvctl
$ srvctl start filesystem -device /dev/asm/volume1-123

  • Change the ownership to oracle

chown -R oracle:dba /acfsmounts/acfs2

2) Use rclone to view objects

The next step is to look at the objects I want to copy to my new ACFS file system. The format of accessing the object store in the commands is
 "rclone {command} [connection name]:{bucket/partial object name - optional}.


NOTE: For all examples my connection name is oci_s3 

I am going to start with the simplest command list buckets (lsd).

NOTE: We are using the s3 interface to view the objects in the namespace.  There is a single namespace space for the entire tenancy.  With OCI there is the concept of "compartments" which can be used to separate applications and users.  The S3 interface does not have this concept, which means that all buckets are visible.
  • rclone lsd - This is the simplest command to list the buckets, and as I noted previously, it lists all buckets, not just my bucket.
       ./rclone lsd oci_s3:
          -1 2021-02-22 15:33:06        -1 Backups
          -1 2021-02-16 21:31:05        -1 MyCloudBucket
          -1 2020-09-23 22:21:36        -1 Test-20200923-1719
          -1 2021-07-20 20:03:27        -1 ZDM_bucket
          -1 2020-11-23 23:47:03        -1 archive
          -1 2021-01-21 13:03:33        -1 bsgbucket
          -1 2021-02-02 15:35:18        -1 bsgbuckets3
          -1 2021-03-03 11:42:13        -1 osctransfer
          -1 2021-03-19 19:57:16        -1 repo
          -1 2021-01-21 19:35:24        -1 short_retention
          -1 2020-11-12 13:41:48        -1 jsmithPublicBucket
          -1 2020-11-04 14:10:33        -1 jsmith_top_bucket
          -1 2020-11-04 11:43:55        -1 zfsrepl
          -1 2020-09-25 16:56:01        -1 zs-oci-bucket

If I want to list what is within my bucket (bsgbucket) I can list that bucket. In this case it treats the flat structure of the object name as if it is a file system, and lists only the top "directories" within my bucket.

./rclone lsd oci_s3:bsgbucket
           0 2021-08-14 23:58:02        -1 file_chunk
           0 2021-08-14 23:58:02        -1 sbt_catalog


  • rclone tree - command will list what is within my bucket as a tree structure.
[opc@rlcone-test rclone]$ ./rclone tree oci_s3:bsgbucket
/
├── expdat.dmp
├── file_chunk
│   └── 2985366474
│       └── MYDB
│           └── backuppiece
│               └── 2021-06-14
│                   ├── DTA_BACKUP_MYDB_4601d1ph_134_1_1
│                   │   └── yHqtjSE51L3B
│                   │       ├── 0000000001
│                   │       └── metadata.xml
│                   └── DTA_BACKUP_MYDB_4d01d1uq_141_1_1
│                       └── lS9Sdnka2nD0
│                           ├── 0000000001
│                           └── metadata.xml
└── sbt_catalog
    ├── DTA_BACKUP_MYDB_4601d1ph_134_1_1
    │   └── metadata.xml
    └── DTA_BACKUP_MYDB_4d01d1uq_141_1_1
        └── metadata.xml


  • rclone lsl- command will list what is within my bucket as a long listing with more detail
[opc@rlcone-test rclone]$ ./rclone lsl oci_s3:bsgbucket
   311296 2021-01-21 13:04:05.000000000 expdat.dmp
337379328 2021-06-14 19:48:45.000000000 file_chunk/2985366474/MYDB/backuppiece/2021-06-14/DTA_BACKUP_MYDB_4601d1ph_134_1_1/yHqtjSE51L3B/0000000001
     1841 2021-06-14 19:48:45.000000000 file_chunk/2985366474/MYDB/backuppiece/2021-06-14/DTA_BACKUP_MYDB_4601d1ph_134_1_1/yHqtjSE51L3B/metadata.xml
 36175872 2021-06-14 19:49:10.000000000 file_chunk/2985366474/MYDB/backuppiece/2021-06-14/DTA_BACKUP_MYDB_4d01d1uq_141_1_1/lS9Sdnka2nD0/0000000001
     1840 2021-06-14 19:49:10.000000000 file_chunk/2985366474/MYDB/backuppiece/2021-06-14/DTA_BACKUP_MYDB_4d01d1uq_141_1_1/lS9Sdnka2nD0/metadata.xml
     1841 2021-06-14 19:48:46.000000000 sbt_catalog/DTA_BACKUP_MYDB_4601d1ph_134_1_1/metadata.xml
     1840 2021-06-14 19:49:10.000000000 sbt_catalog/DTA_BACKUP_MYDB_4d01d1uq_141_1_1/metadata.xml


3) Use rclone to copy the objects to my local file system.


There are 2 command you can use to copy the files from the object store to the local file system.
  • copy - This is as you expect. It copies the files to the local file system and overwrites the local copy
  • sync - This syncronizes the local file system with the objects in the object store, and will not copy down the object if it already has a local copy.

In my case I am going to use the sync command. This will allow me to re-start copying the objects and it will ignore any objects that were previously successfully copies.

Below is the command I am using to copy (synchronize) the objects from my bucket in the object store (oci_s3:bsgbucket) to the local filesystem (/home/opc/acfs).

./rclone -vv sync -P --multi-thread-streams 12 --transfers 64  oci_s3:bsgbucket   /home/opc/acfs

To break down the command.

  • -vv  This option to rclone gives me "verbose" output so I can see more of what is being copied as the command is executed.
  • -P  This option to rclone gives me feedback on how much of the object has downloaded so far to help me monitor it.
  • --multi-threaded-streams 12 This option to rclone breaks larger objects into chunks to increase the concurrency.
  • --transfers 64 This option to rclone allows for 64 concurrent transfers to occur. This increases the download throughput
  • oci-s3:bsgbucket - This is the source to copy/sync
  • /home/opc/acfs - this is the destination to copy/.sync with

Finally, this is the what the command looks like when it is executing.

opc@rlcone-test rclone]$  ./rclone -vv sync -P --multi-thread-streams 12 --transfers 64  oci_s3:bsgbucket   /home/opc/acfs
2021/08/15 00:15:32 DEBUG : rclone: Version "v1.56.0" starting with parameters ["./rclone" "-vv" "sync" "-P" "--multi-thread-streams" "12" "--transfers" "64" "oci_s3:bsgbucket" "/home/opc/acfs"]
2021/08/15 00:15:32 DEBUG : Creating backend with remote "oci_s3:bsgbucket"
2021/08/15 00:15:32 DEBUG : Using config file from "/home/opc/.config/rclone/rclone.conf"
2021/08/15 00:15:32 DEBUG : Creating backend with remote "/home/opc/acfs"
2021-08-15 00:15:33 DEBUG : sbt_catalog/DTA_BACKUP_MYDB_4601d1ph_134_1_1/metadata.xml: md5 = 505fc1fdce141612c262c4181a9122fc OK
2021-08-15 00:15:33 INFO  : sbt_catalog/DTA_BACKUP_MYDB_4601d1ph_134_1_1/metadata.xml: Copied (new)
2021-08-15 00:15:33 DEBUG : expdat.dmp: md5 = f97060f5cebcbcea3ad6fadbda136f4e OK
2021-08-15 00:15:33 INFO  : expdat.dmp: Copied (new)
2021-08-15 00:15:33 DEBUG : Local file system at /home/opc/acfs: Waiting for checks to finish
2021-08-15 00:15:33 DEBUG : Local file system at /home/opc/acfs: Waiting for transfers to finish
2021-08-15 00:15:33 DEBUG : file_chunk/2985366474/MYDB/backuppiece/2021-06-14/DTA_BACKUP_MYDB_4601d1ph_134_1_1/yHqtjSE51L3B/0000000001: Starting multi-thread copy with 2 parts of size 160.875Mi
2021-08-15 00:15:33 DEBUG : file_chunk/2985366474/MYDB/backuppiece/2021-06-14/DTA_BACKUP_MYDB_4601d1ph_134_1_1/yHqtjSE51L3B/0000000001: multi-thread copy: stream 2/2 (168689664-337379328) size 160.875Mi starting
2021-08-15 00:15:33 DEBUG : file_chunk/2985366474/MYDB/backuppiece/2021-06-14/DTA_BACKUP_MYDB_4601d1ph_134_1_1/yHqtjSE51L3B/0000000001: multi-thread copy: stream 1/2 (0-168689664) size 160.875Mi starting
2021-08-15 00:15:33 DEBUG : file_chunk/2985366474/MYDB/backuppiece/2021-06-14/DTA_BACKUP_MYDB_4d01d1uq_141_1_1/lS9Sdnka2nD0/metadata.xml: md5 = 0a8eccc1410e1995e36fa2bfa0bf7a70 OK
2021-08-15 00:15:33 INFO  : file_chunk/2985366474/MYDB/backuppiece/2021-06-14/DTA_BACKUP_MYDB_4d01d1uq_141_1_1/lS9Sdnka2nD0/metadata.xml: Copied (new)
2021-08-15 00:15:33 DEBUG : file_chunk/2985366474/MYDB/backuppiece/2021-06-14/DTA_BACKUP_MYDB_4601d1ph_134_1_1/yHqtjSE51L3B/metadata.xml: md5 = 505fc1fdce141612c262c4181a9122fc OK
2021-08-15 00:15:33 INFO  : file_chunk/2985366474/MYDB/backuppiece/2021-06-14/DTA_BACKUP_MYDB_4601d1ph_134_1_1/yHqtjSE51L3B/metadata.xml: Copied (new)
2021-08-15 00:15:33 DEBUG : sbt_catalog/DTA_BACKUP_MYDB_4d01d1uq_141_1_1/metadata.xml: md5 = 0a8eccc1410e1995e36fa2bfa0bf7a70 OK
2021-08-15 00:15:33 INFO  : sbt_catalog/DTA_BACKUP_MYDB_4d01d1uq_141_1_1/metadata.xml: Copied (new)
2021-08-15 00:15:33 INFO  : file_chunk/2985366474/MYDB/backuppiece/2021-06-14/DTA_BACKUP_MYDB_4d01d1uq_141_1_1/lS9Sdnka2nD0/0000000001: Copied (new)
2021-08-15 00:15:34 DEBUG : file_chunk/2985366474/MYDB/backuppiece/2021-06-14/DTA_BACKUP_MYDB_4601d1ph_134_1_1/yHqtjSE51L3B/0000000001: multi-thread copy: stream 1/2 (0-168689664) size 160.875Mi finished
Transferred:      333.398Mi / 356.554 MiByte, 94%, 194.424 MiByte/s, ETA 0s
Transferred:            6 / 7, 86%
Elapsed time:         2.0s
Transferring:

NOTE: it broke up the larger object into chunks, and you can see that it downloaded 2 chunks simultaneously.  At the end you can see the file that it was in the middle of transferring.

Conclusion.

rclone is great alternative to the OCI CLI to manage your objects and download them.  It has  more intuitive commands (like "rclone ls").  And the best part is that it doesn't require python and special privleges to install.

Friday, March 26, 2021

ZDLRA leverages the ZFS object store in the newest release

Yes, Using ZFSSA as an on-prem object store with ZDLRA is here, and How to configure Zero Data Loss Recovery Appliance to use ZFS OCI Object Storage as a cloud repository (Doc ID 2761114.1) shows you how.


Above is the diagram from Tim Chien's "Ask Tom" session on the new feature with ZDRA release 19.1.1.2.

 For those how have been reading my blog posts, and wondering why the sudden interest in ZFS as an object store, here is another reason.

The idea behind this is pretty simple,  many customers are looking for an additional tier of storage behind the ZDLRA for 2 reasons
  • They want to extend the the recovery window onto a lower tier of storage. This may include going from a full "any point in time" recovery to a set of "recovery points"
  • They want an archival backup for a long period of time that is a set backup point.  Keep backups are the perfect example of this. With Keep backups you get a self-contained restore point of your choosing.
Now for the magic of how all this works.

1. The first step is to configure your ZFSSA as an OCI object store. As long you are on the latest patched release of OS 8.8, this functionality is available to you.  If you are unfamiliar with how to do this, in previous posts, I have walked through the steps of configuring this. Below are some places to start.


Also, here is the documentation from ZFS.

2. The second step is to configure Key Vault (OKV), which is a licensed product. Key vault is a centralized Encryption Key management system that is used to store the master encryption key for the backups.  OKV is released as a virtual image, that can be installed on physical hardware, or in a virtual environment. the installation is self-contained and walks through a series of questions to finish the configuration.  Easy.
  WHY do I need TDE ?  I'm sure you are asking this question.  The "Copy-to-cloud" functionality of the ZDLRA is being utilized to present ZFS as an "OCI cloud store".  It acts just like an object store in the Oracle Public Cloud.  The only difference is that there is no "ARCHIVE" tier on ZFS.  Since ZFS is considered a "Cloud destination", it follows the Larry rule that "All data in the Cloud is encrypted.". Because of that, the backups going to ZFS will be RMAN encrypted (no license needed for this part).  The ZDLRA uses OKV to store the master keys used to encrypt the RMAN backupsets.

3. The third step is to configure the ZDLRA to utilize OKV as a client, and to point the ZDLRA to your ZFS.
  One of the great things of using this solution is that the process is exactly the same as configuring the ZDLRA to send backups to the Oracle public cloud. This link points to the documentation that makes it clear how to configure this process.

That's all there is to it. The most complicated task is configuring the authentication for the OCI object store on ZFS, as it requires setting up a public and private key.

Now to walk through the workflow.

Backups -- Below is the backup workflow from the presentation.  The ZDLRA creates an RMAN backupset from the backup pieces on the ZDLRA. This backupset is an RMAN encrypted backupset.


One item is NOT mentioned on this slide is compression.  If your Database is using TDE, then the backup cannot be compressed when sent to the ZFS because the ZDLRA does not have the encryption master key for the database.  BUT, if your database is NOT TDE enabled, then you should be using compression when sending the backups to the ZFS. As I've said earlier, the backset is an RMAN encrypted backupset. Because it is already encrypted when sent to ZFS, the ZFS will be unable to compress the backups.  You can find instructions to add compression in the documentation for creating a job template.  There is a setting for the template called

Compression_algorithm=> 
By implementing compression on the ZDLRA you are:
  • Decreasing the size of the backups on the ZFS..
  • Decreasing the networkwork traffic between the ZDLRA and ZFS as the data is compressed before it is sent to ZFS. This can double the throughput for backups and restores.
Keep in mind, that if you restore directly to your database host from the ZFS Object store, the database host will be performing the uncompression.

Restores - Below is the restore workflow. Typically you would utilize the catalog on the ZDLRA and let the ZDLRA be the conduit for uncompressing (if it was compressed when sent to ZFS), and unencrypting it, as the ZDLRA encrypted it.  The ZDLRA already has the credentials for the object store, and it has the Encryption master key available to it from OKV.


Alternately you can restore the backups directly from the ZFS object store.
This would be a 3 step process..

1) You would download the Oracle Database Cloud Backup Module . Once downloaded you would configure the database to utilize the OCI object store. The link above also contains links to documentation for the module, and to a MOS note containing the FAQ.  Keep in mind that in this case you are configuring the Module for the on-premise ZFS (rather than the Oracle public cloud), and the instructions may have to be modified. The table below gives you an idea of the differences.


2) You would catalog the backup pieces. If the RMAN catalog is not available (for some reason) the MOS note mentioned below contains detail on how to list what is in the object store, and how to clean it out.

How to report or delete backup pieces stored in Cloud Object Storage by Database Backup Cloud Service without using RMAN (Doc ID 2360800.1)

The script contained in the MOS note ( odbsrmt.py) should work with a few minor changes to the instructions (since we are talking about an on-prem ZFS).  I will continue to work through the changes and post the results in a future blog post.


3) You would register the restore location as an OKV endpoint (if it isn't already registered), OR you can alternately export the encryption key and create a wallet file.


Conclusion - This is a very exciting addition to the many features that the ZDLRA already provides.

Saturday, February 13, 2021

Oracle Database 19c now supports DBMS_CLOUD.

 If you have been wondering why I've spent so much time blogging about how to configure ZFS as an object store, today is the day you get the answer.


Today MOS note 2748362.1 - How To Setup And Use DBMS_CLOUD Package was published.


You are probably saying, "so what?, 21c supports DBMS_CLOUD, and that's a long way off for me"..

This note goes through the steps to configure DBMS_CLOUD for 19c. Yes. it's backported !

NOTE: it is only supported for multitenant

If you were very astute, you might have noticed that the 19.9 release of the software contained scripts in the $ORACLE_HOME/rdbms/admin directory with names like dbms_cloud.sql.

Well today, this published notes explains how to install DBMS_CLOUD packages so that you can use it with your 19.9 + database.

I'm going to take this a step further, and show you how to use these scripts and connect the ZFS appliance.  Keep in mind, there is a ZFS simulator you can use, and do the same steps.

Here is some information on how to do this if you don't know where to start

Configuring ZFS as an object store

Step 1. Install DBMS_CLOUD in the CDB

I am going through the MOS, and I am following the same series of steps.  Creating a script in my /home/oracle/dbc directory, so that I can run this again for all my databases.

Just as in the note, I ran a perl script, and looked at the logs. Everything was successful.

I then ran the 2 queries. First against the CDB, then against the PDB.


So far so good.


Step 2 Create SSL Wallet with Certificates.

The next step is to create a wallet, and download the certificates using the link.  The certificates come in a zip file containing all 3 certificates.

VeriSign.cer
BaltimoreCyberTrust.cer
DigiCert.cer

These are the Certificate Authorities that will be used to authenticate the SSL certificates.  DBMS_CLOUD uses HTTPS, and requires that a valid certificate is used.


ZFS NOTE BEGIN : *************************************

At this point there is an additional step for using ZFS (or your own object store). You need to add the certificate to the wallet if it is a self-signed certificate (which is what ZFS will use normally).

In order to get the certificate you need to display it with the following command (filling in your IP address).

openssl s_client -showcerts -connect 10.136.64.85:443

From the output I want to grab the certificate which is between the BEGIN and END


-----BEGIN CERTIFICATE-----
MIIEWTCCA0GgAwIBAgIIXJAYBgAAAAIwDQYJKoZIhvcNAQELBQAwcDEtMCsGA1UE
AwwkenM3LTJjYXAtMjAwZi12bTAyLnVzLm9zYy5vcmFjbGUuY29tMT8wPQYDVQQN
DDZodHRwczovL3pzNy0yY2FwLTIwMGYtdm0wMi51cy5vc2Mub3JhY2xlLmNvbToy

..

oH4pa4Hv4/s0GKJcjQDTlhyyAQXHD+EDfa0KSqP6+Rcwv9+pzXhTJu6IYJLanKo

uM6RxG2XAIH82blU+A==
-----END CERTIFICATE-----

Once I put it in a file, I perform the same command to load these certificates from my file.

ZFS NOTE END : *****************************************

Once added I display what is in the wallet.

orapki wallet display -wallet .
Oracle PKI Tool Release 21.0.0.0.0 - Production
Version 21.0.0.0.0
Copyright (c) 2004, 2020, Oracle and/or its affiliates. All rights reserved.

Requested Certificates:
User Certificates:
Trusted Certificates:

Subject:        2.5.4.13=https://zs7-2cap-200f-vm02.bgrenn.com:215/\#cert,CN=zs7-2cap-200f-vm02.bgrenn.com
Subject:        2.5.4.13=https://zs7-2cap-200f-vm01.bgrenn.com:215/\#cert,CN=zs7-2cap-200f-vm01.bgrenn.com
Subject:        CN=DigiCert Global Root CA,OU=www.digicert.com,O=DigiCert Inc,C=US
Subject:        CN=Baltimore CyberTrust Root,OU=CyberTrust,O=Baltimore,C=IE
Subject:        CN=VeriSign Class 3 Public Primary Certification Authority - G5,OU=(c) 2006 VeriSign\, Inc. - For authorized use only,OU=VeriSign Trust Network,O=VeriSign\, Inc.,C=US


You can see that it captured the server names of the ZFS ports I am using.


Step 3 Configure the Oracle environment for the Wallet.


I followed the next set of instructions to update the sqlnet.ora file with the location of wallet.

A few items to note on this step
  • I am in a RAC environment so I need to make the change to ALL nodes in my RAC cluster, and I also need to copy the wallet to the nodes in the same location on all hosts.
  • The WALLET_LOCATION is also used by ZDLRA. if you are using a ZDLRA for backups, you need add the certificates to wallet that is used by the ZDLRA.
  • If you using Single Sign On which may use the WALLET_LOCATION, be especially careful since they often default to $ORACLE_BASE, but will get over ridden when this is set.
I completed these steps, and I now have the same sqlnet.ora file on all nodes, and my wallet is on all nodes in the same location under $ORACLE_BASE.

Step 4 Configure the Database with ACEs for DBMS_CLOUD.


The next step is to create Access Control Entries (ACEs) to allow communication. This only needs to be in CDB$ROOT.

I stored the script in a file and changed the script in 2 ways

  • define sslwalletdir= {my wallet locatioin}  --> I set this.
  • I removed all lines around proxy. I didn't need a proxy since I am only using a ZFS internal to my datacenter.
I verified with the query and it returned the location of SSL_WALLET.

Step 5 Verify the configuration of the DBMS_CLOUD

I put the script in a file and made a few changes.

  • wallet_path => {my wallet path}
  • wallet_password => {my wallet password}
  • get_page('https://zs7-2cap-200f-vm02.bgrenn.com') --> I put in the URL for my first ZFS network name (from the certificate) followed by the second name from the certificate.
I got a "valid response" backup.. 
I can also check the ACLs with the script below
SELECT host, lower_port, upper_port, acl
FROM   dba_network_acls;

Step 6 Configure users or roles to use  DBMS_CLOUD

I changed the script to use my username which I created in my PDB to create tables etc. and utilize DBMS_CLOUD, and ran it in my pdb.

I took the second script, removed the proxy information , entered the wallet path and executed in my  PDB.

Step 6 Configure users or roles to use DBMS_CLOUD


I changed the script and added my username in my PDB.


Step 7 Configure ACEs for a user role to use DBMS_CLOUD


Again I removed the proxy information since there was no proxy. I also entered the SSL_wallet directory.

Step 8  Configure the credential for OCI (or S3 if you prefer).


Using the create credential and the parameters I have pointed out in previous posts.

 I create a credential to point to my OCI bucket on ZFS.


exec DBMS_CLOUD.CREATE_CREDENTIAL ( -
    CREDENTIAL_NAME => 'ZFS', -
    USER_OCID => 'ocid1.user.oc1..oracle', -
    TENANCY_OCID => 'ocid1.tenancy.oc1..nobody', -
    PRIVATE_KEY => 'MIIEogIBAAKCAQEAnLe/u2YjNVac5z1j/Ce7YRSd6wpwaK8elS+TxucaLz32jUaDCUfMbzfSBP0WK00uxbdnRdUAss1F1sRUm+GqyEEvT2c1LRJ0FnfSFEXrJnDZfEVe/dFi90fctbx4BUSqRroh0RQbQyk24710zO2C3tev66eHEvfxxXGUqI+jrDKOJ7sFdGE42R9uRhhWxaWS4e43OEZk41gq2ykdVFlNp...mXU6w6blGpxWkzfPMJKuOhXYoEXM41uxykDX3nq/wPWxKJ7TnShGLyiFMWiuuQF+s29AbwtlAkQRcHnnkvDFHwE=', -
    FINGERPRINT => '1e:6e:0e:79:38:f5:08:ee:7d:87:86:01:13:54:46:c6');

Note the parameters for ZFS

  • CREDENTIAL_NAME - Name of the credential
  • USER_OCID - 'ocid1.user.oci..' || {ZFS user id}
  • TENANCY_ID - 'ocid1.tenancy.oci1..nobody' - hardocded in
  • PRIVATE_KEY - Private key matching the public key on the ZFS
  • FINGERPRINT - fingerprint for the public key on the ZFS.

Step 9  Load raw data to the object store.


First I am going to open a file, and put some data into it.. Upload the file to my OCI bucket and then create an external table on it.

Below is the input file.

 16TS$                           TABLE                    1904172019041720190417VALID
        20ICOL$                         TABLE                    1904172019041720190417VALID
         8C_FILE#_BLOCK#                CLUSTER                  1904172019041720190417VALID
        37I_OBJ2                        INDEX                    1904172019041720190417VALID
        22USER$                         TABLE                    1904172019041720190417VALID
        33I_TAB1                        INDEX                    1904172019041720190417VALID
        40I_OBJ5                        INDEX                    1904172019041720190417VALID
        31CDEF$                         TABLE                    1904172019041720190417VALID
        41I_IND1                        INDEX                    1904172019041720190417VALID
         3I_OBJ#                        INDEX                    1904172019041720190417VALID
         6C_TS#                         CLUSTER                  1904172019041720190417VALID
        51I_CON1                        INDEX                    1904172019041720190417VALID
        34I_UNDO1                       INDEX                    1904172019041720190417VALID
        11I_USER#                       INDEX                    1904172019041720190417VALID
        29C_COBJ#                       CLUSTER                  1904172019041720190417VALID
        49I_COL2                        INDEX                    1904172019041720190417VALID
        32CCOL$                         TABLE                    1904172019041720190417VALID
        14SEG$                          TABLE                    1904172019041720190417VALID
        23PROXY_DATA$                   TABLE                    1904172019041720190417VALID
        44I_FILE2                       INDEX                    1904172019041720190417VALID
        46I_USER1                       INDEX                    1904172019041720190417VALID
        56I_CDEF4                       INDEX                    1904172019041720190417VALID
        21COL$                          TABLE                    1904172019041720190417VALID
        47I_USER2                       INDEX                    1904172019041720190417VALID
        26I_PROXY_ROLE_DATA$_1          INDEX                    1904172019041720190417VALID
        18OBJ$                          TABLE                    1904172019041720190417VALID
        42I_ICOL1                       INDEX                    1904172019041720190417VALID
        19IND$                          TABLE                    1904172019041720190417VALID
        39I_OBJ4                        INDEX                    1904172019041720190417VALID
        59BOOTSTRAP$                    TABLE                    1904172019041720190417VALID
        36I_OBJ1                        INDEX                    1904172019041720190417VALID
        15UNDO$                         TABLE                    1904172019041720190417VALID
        10C_USER#                       CLUSTER                  1904172019041720190417VALID
         4TAB$                          TABLE                    1904172019041720190417VALID
         2C_OBJ#                        CLUSTER                  1904172019041720190417VALID
        28CON$                          TABLE                    1904172019041720190417VALID
         5CLU$                          TABLE                    1904172019041720190417VALID
        27I_PROXY_ROLE_DATA$_2          INDEX                    1904172019041720190417VALID
        24I_PROXY_DATA$                 INDEX                    1904172019041720190417VALID
        45I_TS1                         INDEX                    1904172019041720190417VALID
        13UET$                          TABLE                    1904172019041720190417VALID
        12FET$                          TABLE                    1904172019041720190417VALID
        17FILE$                         TABLE                    1904172019041720190417VALID

I created a file locally (/tmp/objects.csv), created a bucket (using the OCI CLI tool) and uploaded the file.

Create the bucket on zfs

oci os bucket create --endpoint http://zs7-2cap-200f-vm02.bgrenn.com/oci --namespace-name export/objectstoreoci --compartment-id export/objectstoreoci --name bucketoci  


And copy my file to my bucket.

oci os object put --endpoint http://zs7-2cap-200f-vm02.bgrenn.com/oci ---namespace-name export/objectstoreoci --bucket-name bucketoci  - --file /tmp/objects.csv  --name objects.csv


Step 10  Create an external table on the object.


Now we have the file in the bucket we are ready to create the external table.

ZFS NOTE BEGIN : ***************************************

There is an additional step to access the ZFS. There is a table owned by C##CLOUD$SERVICE which contains the objects store that can be accessed, and how to authenticated. By looking at the current entries you can see the types for OCI and S3.

until I do this you will an error like this..


ERROR at line 1:
ORA-20006: Unsupported object store URI -
https://zs7-2cap-200f-vm01.bgrenn.oracle.com/export/objectstoreoci/bucketoci
/objects.csv
ORA-06512: at "C##CLOUD$SERVICE.DBMS_CLOUD", line 917
ORA-06512: at "C##CLOUD$SERVICE.DBMS_CLOUD", line 2411
ORA-06512: at line 1

Here is the table that we need to change. You can see that it contains 
  • CLOUD_TYPE - authentication to use
  • BASE_URI_PATTERN - URI pattern to identify and allow
  • VERSION - This is used if different authentication versions exist for an object store
  • STATUS - Not sure, but they are all '1'


 desc C##CLOUD$SERVICE.dbms_cloud_store;
 Name                       Null?    Type
 ----------------------------------------- -------- ----------------------------
 CLOUD_TYPE                        VARCHAR2(128)
 BASE_URI_PATTERN                    VARCHAR2(4000)
 VERSION                        VARCHAR2(128)
 STATUS                         NUMBER

I add a row to this table for my object store.  ORACLE_BMC is the OCI authentication

SQL> insert into C##CLOUD$SERVICE.dbms_cloud_store values ('ORACLE_BMC','%.bgrenn.com',null,1);

1 row created.

SQL> commit;

Commit complete.


ZFS NOTE END : *****************************************


We are ready, now let's create the table and give it a go !!

Create the external table on the object
exec DBMS_CLOUD.CREATE_EXTERNAL_TABLE( -
    table_name      =>'CHANNELS_EXT_ZFS', -
    credential_name =>'ZFS', -
    file_uri_list   =>'https://zs7-2cap-200f-vm01.bgrenn.com/oci/n/export/objectstoreoci/b/bucketoci/o/objects.csv', -
    format          => json_object('trimspaces' value 'rtrim', 'skipheaders' value '1', 'dateformat' value 'YYYYMMDD'), -
    field_list      => 'object_id      (1:10)   char' || -
                      ', object_name    (11:40)  char' || -
                      ', object_type    (41:65)  char' || -
                      ', created_date1  (66:71)  date mask "YYMMDD"' || -
                      ', created_date2  (72:79)  date' || -
                      ', last_ddl_time  (80:87)  date' || -
                      ', status         (88:97)', -
   column_list     => 'object_id      number' || -
                      ', object_name    varchar2(30)' || -
                      ', object_type    varchar2(25)' || -
                      ', status         varchar2(10)' || -
                      ', created_date1  date' || -
                      ', created_date2  date' || -
                      ', last_ddl_time  date');

Select from the table.

OBJECT_ID OBJECT_NAME              OBJECT_TYPE            STATUS
---------- ------------------------------ ------------------------- ----------
CREATED_D CREATED_D LAST_DDL_
--------- --------- ---------
    20 ICOL$              TABLE             VALID
17-APR-19 17-APR-19 17-APR-19

     8 C_FILE#_BLOCK#          CLUSTER            VALID
17-APR-19 17-APR-19 17-APR-19

    37 I_OBJ2              INDEX             VALID
17-APR-19 17-APR-19 17-APR-19


That's all there is to it.

Enjoy !

Wednesday, February 10, 2021

Oracle Cloud object Store access with rlone.

 If you are using the Oracle Object Store as part of the Oracle Public Cloud, "rclone" is an open source tool you can use to make things easier.


One of the things I really like about RCLONE is that it provides a command line like interface that is easy to use.  If you have looked at the OCI cli tool, it requires a myriad of parameters.  Below is the command I was using with OCI to view my list of buckets (I obfuscated some of the values).

oci os bucket list --endpoint https://objectstorage.us-ashburn-1.oraclecloud.com  --namespace-name id20xxxxxofo --compartment-id ocid1.compartment.oc1..aaaaaaxxxxxxxxxxxxxxxxxcpqyvzzb4ykd3tyq --config-file ~/.oci/natdconfig 

In order to use the OCI tool, I had to constantly keep a text file open to copy and paste commands.

In comparison, this is the command to list the buckets in my object store using rlcone.

rclone ls oci_bucket:


1) Configure compatibility for an S3 interface in the Public cloud.

In your public cloud council, in the top right hand corner, click on the "silhouette" that controls you settings. in the pull down menu click on "user settings" to bring up the window to configure you resources.  Once there, click on "Customer Secret keys" and then "Generate Secret Key" bring up the window to add a secret key.


On this window give your secret key a name (like S3Key" in my case).  When you click the "Generate Secret key" button, it will give you secret associated with key. SAVE THIS.

Once complete, you will have 2 items associated with your account

NAME:            S3Key                                                        or whatever you named your key.
Access Key:    ddddddddddddeeeeeeeeeffffffffggggg      A uniquely identified key ID
Secret Key :   dd32234sdwercfwe                                     A system generated "secret"

2) Download rclone.

     This can easily be done from the  RCLONE.ORG site.

    Note: You chose the platform you want to execute rclone on, then download the .zip file.
              The .zip file contains the execute, and documentation.
              Copy the "rclone" executable to the location of your choice and make it executable.


2) Configure Rclone.

    You start by executing "rclone config". This will create a configuration file in ~/.config/rclone/rclone called rclone.conf.  This is an interactive interface that will set the correct configuration parameters to be used.

This is an example of what I entered to connect to my Object Store using the S3 interface.

--> rclone config

Give this entry a unique name to identify the S3 object store.
 
Name> oci_s3    <-- my entry name in the config file 


Type of storage to configure.
Enter a string value. Press Enter for the default ("").
Choose a number from below, or type in your own value
..
 4 / Amazon S3 Compliant Storage Provider (AWS, Alibaba, Ceph, Digital Ocean, Dreamhost, IBM COS, Minio, Tencent COS, etc)
..
Storage> 4      <-- 4 identifies this as an S3 compatible object store


Choose your S3 provider.
Enter a string value. Press Enter for the default ("").
Choose a number from below, or type in your own value
..
13 / Any other S3 compatible provider
..
provider> 13      <-- 13 identifies this as "other" S3 compatible object store


Get AWS credentials from runtime (environment variables or EC2/ECS meta data if no env vars).
Only applies if access_key_id and secret_access_key is blank.
Enter a boolean value (true or false). Press Enter for the default ("false").
Choose a number from below, or type in your own value
 1 / Enter AWS credentials in the next step
   \ "false"

 env_auth> 1     <-- 1 to identify that we are using  "AWS compatible Key" for authentication


AWS Access Key ID.
Leave blank for anonymous access or runtime credentials.
Enter a string value. Press Enter for the default ("").

access_key_id>  ddddddddddddeeeeeeeeeffffffffggggg   <-- This is the Access key ID that was generated from my name in the public cloud


AWS Secret Access Key (password)
Leave blank for anonymous access or runtime credentials.
Enter a string value. Press Enter for the default ("").

secret_access_key> dd32234sdwercfwe  --> The system generated key associated with my access key


Region to connect to.
Leave blank if you are using an S3 clone and you don't have a region.
Enter a string value. Press Enter for the default ("").
Choose a number from below, or type in your own value
 1 / Use this if unsure. Will use v4 signatures and an empty region.
   \ ""

region>        --> Leave blank


Endpoint for S3 API.
Required when using an S3 clone.
Enter a string value. Press Enter for the default ("").
Choose a number from below, or type in your own value

endpoint> {namespace}.compat.objectstorage.{region}.oraclecloud.com   --> Note that you will need to fill in your namespace from your account, and ensure the region is correct for the URL.


Location constraint - must be set to match the Region.
Leave blank if not sure. Used when creating buckets only.
Enter a string value. Press Enter for the default ("").

location_constraint>        --> Leave blank


Canned ACL used when creating buckets and storing or copying objects.

This ACL is used for creating objects and if bucket_acl isn't set, for creating buckets too.

For more info visit https://docs.aws.amazon.com/AmazonS3/latest/dev/acl-overview.html#canned-acl

Note that this ACL is applied when server side copying objects as S3
doesn't copy the ACL from the source but rather writes a fresh one.
Enter a string value. Press Enter for the default ("").
Choose a number from below, or type in your own value
 1 / Owner gets FULL_CONTROL. No one else has access rights (default).
   \ "private"

acl>          --> Leave blank


Edit advanced config? (y/n)
y) Yes
n) No (default)

 y/n>           --> Leave blank


Remote config
--------------------
[oci_s3]
type = s3
provider = Other
env_auth = false
access_key_id = S3_Key
secret_access_key = ddddddd...
endpoint = xxxxxxx.compat.objectstorage.us-ashburn-1.oraclecloud.com
--------------------
y) Yes this is OK (default)
e) Edit this remote
d) Delete this remote

y/e/d> y           --> y to save this entry


3) Validate rclone.


Now let's verify what got create.

> cat ~/.config/rclone/rclone.conf

[oci_s3]
type = s3
provider = other
env_auth = false
access_key_id =dd32234sdwercfwe
secret_access_key = dddddxxxxxx
endpoint = xxxxxxx.compat.objectstorage.us-ashburn-1.oraclecloud.com
acl = authenticated-read

That's It.  In my case 
  • the entry is "oci_s3"
  • The access key for S3 is dd32234sdwercfwe"
  • The secret associated with my S3 key is "dddddxxxxxx"
  • The end point I am connecting to is "xxxxxxx.compat.objectstorage.us-ashburn-1.oraclecloud.com"
    • "xxxxxxx" is my namespace
    • "us-ashburn-1" is my region


4) Using rclone.


Now with rclone I can execute commands against my object store that are more linux like.

rclone mkdir oci_s3:mybucket  --> will create a bucket named "mybucket"
rclone ls oci_s3:  --> will list all my buckets
rclone ls oci_s3:mybucket --> will list all the objects in my bucket.

I can also use it to copy to and from my bucket.

rlcone copy /home/oracle/myfile.txt oci_s3:mybucket   --> copies the file to the bucket.

Finally, a great command is sync to synchronize the contents of my on-prem to the cloud

 rlcone sync /home/oracle/mydir/ oci_s3:mybucket  --> this will sync the two locations

Now how fun with it !!


Tuesday, January 5, 2021

Managing an Object Store on ZFS

 This blog post will cover how to access the object store on ZFS to create buckets and upload files. For S3, I am using Cloudberry, which I downloaded here. For OCI, I am using the OCI cli tool.


S3 access to ZFS

This is the easiest, since the S3 object store on ZFS is an S3 compatible interface.

In cloudberry add a new account and use the following for input.


Note that you need to enter the 4 fields above.

  • Display Name -- What you want to call the new account entry
  • Service Point  -- This is the ZFS interface for S3 in the form of 
HTTP://{the IP of the ZFS}/s3/v1/{share name}
  • Access Key  -- This is the name you gave the S3 access key, when you added it to the ZFS
  • Secret Key   -- This is the long string of characters that was returned by ZFS when you created the key.
That's it ! You can now use cloudberry to create buckets, upload files, sync object stores etc.


OCI access to ZFS

Install the CLI

Like the Oracle cloud, there is currently (as of me writing the blog post), no GUI tool like cloudberry that will connect to an OCI object store.  When connecting to the Oracle cloud, you can access the OCI object store through the S3 interface, but this is not possible on ZFS. Both the OCI and S3 object store are independent and cannot access buckets etc. in the other object store.

In order to access ZFS through OCI we start with downloading the OCI cli tool. Documentation on how do this can be found here.

In my install, I took the easy route  (and since I had a Ubuntu client with root access to play with). I installed it directly using "sudo pip install oci-cli"

Create a config file.


Once you have the OCI cli installed we need to set up a configuration file to be used.
The default file is ~/.oci/config, but this location can be changed when using the command if you access multiple OCI installations.

This is the contents of my file.


1
2
3
4
5
6
7
[DEFAULT]
user=ocid1.user.oc1..oracle
fingerprint=1e:6e:0e:79:38:f5:08:ee:7d:87:86:01:13:54:46:c6
key_file=/home/oracle/opc/oracle_private.pem
tenancy=ocid1.tenancy.oc1..nobody
region=us-phoenix-1
pass_phrase = oracle

Now to walk through each line.

1. This identified the entry. Since the config file can contain entries for multiple OCI locations, this entry is identified as the default entry to use (If I don't specify one).
2. This is the user ID.  Since I am using ZFS, the format is "ocid1.user.oc1..{zfs user}"
3. This is the fingerprint. I mentioned in the last blog post that this will be needed. This fingerprint identifies the API public_key entry on ZFS to use when matching the private API key being sent
4. This is the private key file. This contains the private API key that matches the public key that was added to the ZFS.
5. This is unimportant to ZFS, but is required to be set. Use the entry above.
6. Like #5. this is not used by ZFS but is needed by the OCI client.
7. This is optional. If the API private key was created with a pass_phrase, this the pass_phrase that matches the private key.


Create a bucket on OCI.

Almost there now ! We have everything in place for authentication, and we are ready to create an OCI bucket on ZFS for storing data.

The command is 

oci os bucket create --endpoint {OCI object store location} --namespace-name {location on the object store} --compartment-id {compartment in OCI} --name {new bucket name}


Now let's walk through what the parameters will be for ZFS

--endpoint               -> For my ZFS appliance, it is the url + oci
--namespace-name  -> This is the share on the ZFS.  "/export/short" in my config.
--compartment-id    -> This is also the share on the ZFS.  "/export/short" in my config.
--name                     -> the name of the bucket I want to create.

For my configuration below is the command and the output.. I now have a bucket created, and I am able upload data !


oci os bucket create --endpoint http://10.0.0.110/oci --namespace-name export/short --compartment-id export/short --name mynewbucket 

{
  "data": {
    "approximate-count": null,
    "approximate-size": null,
    "compartment-id": "export/short",
    "created-by": "oracle",
    "defined-tags": null,
    "etag": "a51c8ecbf1429f95b446c4413df9f494",
    "freeform-tags": null,
    "id": null,
    "is-read-only": null,
    "kms-key-id": null,
    "metadata": null,
    "name": "mynewbucket",
    "namespace": "export/short",
    "object-events-enabled": null,
    "object-lifecycle-policy-etag": null,
    "public-access-type": "NoPublicAccess",
    "replication-enabled": null,
    "storage-tier": "Standard",
    "time-created": "2021-01-05T16:15:05+00:00",
    "versioning": null
  },
  "etag": "a51c8ecbf1429f95b446c4413df9f494"
}


ADVANCED TOPIC -- SSL with OCI CLI


Now let's say I want to encrypt my connections to OCI and use the HTTPS server available on ZFS.
First I need to create a file containing the certificate. I can get the certificate by executing.

openssl s_client -showcerts -connect 10.0.0.110:443

This returns a lot of information, but within the output I can see the certificate, and I can copy and paste into a file.

Certificate chain
 0 s:CN = 10.0.0.110, description = https://10.0.0.110:215/#cert
   i:CN = 10.0.0.110, description = https://10.0.0.110:215/#cert
-----BEGIN CERTIFICATE-----
MIIDXDCCAkSgAwIBAgIIW+387wAAAAIwDQYJKoZIhvcNAQELBQAwPDETMBEGA1UE
AwwKMTAuMC4wLjExMDElMCMGA1UEDQwcaHR0cHM6Ly8xMC4wLjAuMTEwOjIxNS8j
Y2VydDAeFw0wNjAyMTUxODAwMDBaFw0zODAxMTkwMzE0MDdaMDwxEzARBgNVBAMM
CjEwLjAuMC4xMTAxJTAjBgNVBA0MHGh0dHBzOi8vMTAuMC4wLjExMDoyMTUvI2Nl
cnQwggEiMA0GCSqGSIb3DQEBAQUAA4IBDwAwggEKAoIBAQCyfgnTMtxgPEtrmCpB
J4gHngdqpRQWnUXA/OtWGymXME/+gAd5Q/8LZ74VpkHIwk3T7z/+tJVgL1HFmmbi
ZRSsXfSUgOBHm0doPn3VGbykz5MHWm3HHwjpPwvVhyeuVEkUfs/yiZ9B1WZrkr6U
ePNKlkbdL1VN5q2zuLdJ7+jn3HIiSS9j10i7HQVFEuzUAGdt3q0rp2MwaxSP6+cZ
hzMaI5IGBHuVkw2fGX1RdDB6uZpFEEhRSHURr5/3d+UgOprkMKp8Wph3kH0E2Nha
tGpSn2/6NM/Up/nDjfu2Dxm9A2aCwC56ShTckTTxE2HrgfSE9r/vEnkJEdSemH+X
9BuRAgMBAAGjYjBgMCYGCWCGSAGG+EIBDQQZFhdBdXRvbWF0aWNhbGx5IGdlbmVy
YXRlZDA2BgNVHREBAf8ELDAqggoxMC4wLjAuMTEwhwQKAABuhhZodHRwczovLzEw
LjAuMC4xMTA6MjE1MA0GCSqGSIb3DQEBCwUAA4IBAQAqxZk2knSBinWvTADkrvuS
C3vkeLyOLCRwABnGzZV80AAZ3tSVZt2JPXtg8uAVEj29J4VFw/I7HuneGL/faW9q
Qr9h+2WjvoT+m6lIfwELeaomZhkrLmJomGqSP1wfw5jaw3cpt0yOeS4RWUYb9eEe
bTH6laFBtSdbaI/uHslxpJwNRDwn8zBpAWmZk83UQ5CytH37yrFPRoHQWp+OqF+V
GYTPA4drxQ00nuelNfpHWMCjjMr0WxFz5rNJPMOAe2W1Xcr/MM1h04kGVwRtYsC0
4izqKtfiOHt0wMkSbYuSj1tIzdEzjVmxNSS7nv/znrMt+6SsdYQHMmaJ4+wHlJo4
-----END CERTIFICATE-----
---
Server certificate
subject=CN = 10.0.0.110, description = https://10.0.0.110:215/#cert

I want to copy the certificate including the "BEGIN CERTIFICATE" and "END CERTIFICATE" lines into a file. 

I now need to set my environment to see the certificate file and use it. In my case "/home/oracle/opc/wallet_cloud/zfs.cer"

export REQUESTS_CA_BUNDLE=/home/oracle/opc/wallet_cloud/zfs.cer

I can now view the buckets in my object store, and upload files encrypted.

oci os bucket list --endpoint https://10.0.0.110/oci --namespace-name export/short --compartment-id export/short 
{
  "data": [
    {
      "compartment-id": "export/short",
      "created-by": "oracle",
      "defined-tags": null,
      "etag": "a51c8ecbf1429f95b446c4413df9f494",
      "freeform-tags": null,
      "name": "mynewbucket",
      "namespace": "export/short",
      "time-created": "2021-01-05T16:15:05+00:00"
    }
  ]
}


The OCI documentation should give you everything you need to upload/download objects within a bucket.

Managing authentication for a ZFS Object Store

 As promised, I am continuing my blog series on how to work with ZFS as a cloud store.


My first blog post went through the steps of how to configure ZFS as an object store.

This post will go through how to create the authentication keys/secrets to access  Object Store.

OCI/S3 user management

The first thing to do is to create a user on the ZFS that will be used as the owner of the object store.

In my case I am going to use the "oracle" account, and ensure that the GUID is the same as the GUID I use on all my DB servers.


NOTE: Most of the information I used to go through the process was from this document.

Create the user

Start by logging into the web interface for the ZFS appliance and navigate to Configuration -> users .

Once on this page, click on the + sign next to users to create a new user. In the example, I had already created the Oracle user.


Now on the create user page, ensure the user is a "local" user, and the "User ID" is the same as the GUID I normally use for Oracle. After entering the information, click on "ADD" in the upper right hand corner to add the user.


Change share ownership

Now that I have the "oracle" user created, I am going to change ownership on my share that will be my object store.

In order to do this, I am going navigate to Shares -> SHARES . I see my object store share and highlight it and click on the pencil icon to edit the share.


I am now on the detail screen for my share, and I navigate to the Shares -> SHARES -> Access page.
On this page, I change the user to be Oracle, and ensure the permissions are open enough. Once this change is made click on the apply button in the top right hand corner.


OCI Authentication.

Create the API keys

Now we need to add to add the API key to authenticate the user to the Object store.
In the case of an OCI bucket, authentication is performed by using an X.509 certificate.
This is the same authentication used for an OCI bucket in the Oracle Cloud.

Instructions on how to create an API signing key can be found here.

In my case I used the linux command instructions, and the openssl command to create both a private and public key.  When completed, I had 2 files.

/home/oracle/opc/oracle_public.pem  
        -----BEGIN PUBLIC KEY-----
        sdfa23
        ....
        -----END PUBLIC KEY-----

/home/oracle/opc/oracle_private.pem  
       -----BEGIN RSA PRIVATE KEY----
        5dfgsret345
        ....
        -----END RSA PRIVATE KEY-----

Add the API key

Now that we generated the Keys, lets add them to the share so we can access the OCI object store.

We start by going to Configuration-> Services -> HTTP. Click on HTTP to bring up the next page.


On this page, we want to go to the OCI tab and add a new key.


On the "New Key" window that popped up, add the Oracle user, and paste in the public key. Once everything is entered click on add to create the key.


Once added make note of the Fingerprint.


S3 Authentication.

Create the Secret.

Unlike OCI, S3 authentication is done through a "secret".  The use of a "secret" is similar to the idea of a Key and a Passcode. You create a new access  key for the user, and you then you are provided a long string that is the "passcode" for this key.

Like creating API key for OCI, we start by going to the HTTP service.


This time we go the S3 tab under HTTP and click on the + sign to add a key.


Enter the oracle user, and give your key a name. Once complete, click on ADD to create the key.


Now you will see a window with the Secret Key.
SAVE THIS KEY. you will not be given this key again. You can copy and paste it, but better yet, save it in a file.


Authentication for S3 and OCI.


When you completed both of these actions you will have 2 authentication pieces that we will use to create buckets and access the object store in future blog posts.

S3 - You have an "ACCESSS_KEY" and a "SECRET_KEY" that will be used.

OCI - You have a file containing the private_key, public_key, and the fingerprint associated with the public_key to identify it.